Hey, how’s it going this is Shawn Daniel with Guitar Control, today I will show you how to play the song called “Girl from the North Country” by Bob Dylan. I’m excited about this lesson because this is my absolute favorite Bob Dylan song ever, really a great masterpiece and guitar arrangement. I think it’s a must know for anybody who’s into finger style of guitar.
[ninja-popup ID=715]
Click on the Tabs button to follow the chords and tabs.
Its start with a capo on the 3rd fret and the 1st chord is going to be like an E minor type of chord but maybe one that you haven’t really seen before. I think the best way to do this is to take an E minor, take your ring finger off, now you have an a minor 7, like the 1st fret on the B-string and the 2nd fret on the D-string. Now move this two frets higher, I think this is a pretty open chord.
Another way to look at this is like a B minor but without your pointer finger or your pinky, now my middle finger is on the 3rd fret of the B-string, my ring finger is on the 4th fret relative to capo of the D-string. We’re going to hang on to this chord for because this will be really just a one chord progression that repeats, but the way the displayed is really cool and I think a beautiful Intro, to maybe kind of Travis style finger picking.
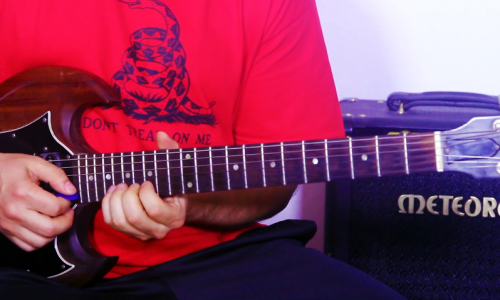
We’re going to hang on this chord until we get this pattern, down with our thumb and fingers. The way this works is your thumb is going to be responsible for the E and the D-string okay which is common in a lot of different finger picking practices. Your thumb will be responsible for the lowest three strings; most of us are going to be jumping back between the E and the D-string keeping a steady beat.
Now your pointer finger is getting be responsible for the G-string and middle finger will be responsible for the B-string and then sometimes (optional) your ring finger can come in and grab the high E-string if you want. You don’t have to do it and if you’re just really into finger style for the first times these two fingers and a thumb is going to be just fine.
We start with the E-string, and then D, and B at the same time, and the E string again, G by itself D-string, e d, d and b, e, g, and d, e, d, and b, e, g and d, thumb both, thumb pointer thumb, thumb when I say both thumb in middle, thumb pointer thumb and before we go on, just really get this nice and steady because this will be the muscle memory that you want to bring in to your playing as a pattern and eventually you can speed it up and your thumb is keeping the pulse of the song, left hand or fretting hand is doing something really easy and we’re kind of hanging out on this one chord.
From here we go to another chord which is a d7 chord but with your middle finger hitting the root note or the bass note as an f-sharp. Depending on how you want to play it, a couple different frames you do, I think the fingering that works best for me is pointer finger on the 1st fret of the B string that’s C note relative to the capo, ring finger to G, middle finger holding on the bass on the low E-string. Now we do the same thing we can go E-D-B-E-G-D same pattern different core alright well call it a d7 cord even though it’s a d7 slash F sharp, because F sharp is our bass note so we’ve kept through the first one back and forth even though this isn’t the way the song goes totally just do it one bar at a time.
The E minor chord to the d7, now if you notice if you play this your pointer finger can hang on to that B-string and slide up, and down, that’s going to be the actual way displayed we have two times through on the E minor we’ll call it C minor gun 1, 2, 3, and 4, 1, 2, 3, and 4, d7.
Go from the E minor to that D7 and go to this G major chord, now a lot of times you play a G major in the traditional way where your middle finger is out front on the root note. What I do is using my ring finger grabbing the 3rd fret on the low E-string and pinky is grabbing the high G. This is totally acceptable as a G major we don’t even need the A-string because remember your thumb is kind of skipping over that.
Now I’m getting G, E, D, and the high E-string. Sometimes I’ll grab this entire ring finger (optional) using your ring finger or middle finger whatever you decide stick with it because you want to create repeatable muscle memory type deals, you can use in all sorts of finger style.
This is just a G major chord, now the reason we’re playing it with your ring finger first is because we’re going to go to a C major chord, but the C chords can look like this and not a C major chord. We don’t need an A-string because you’re not getting a lot of A string business going on in this “Girl from the North Country”. We’re kind of skipping that A-string, we only need this and that G, which G is a note in A, which could be a C / G chord.
The cool thing about this is we can switch back and forth between a G chord finger style and a C chord while being able to keep our ring finger on the 3rd fret to hold down the based. I’m getting E, D, and E, and then to the C chord so E, D and E, E, G, D, E, D and B, E, D and B, E, G, D, B, D and E, E, G, D. The second time I’m putting my middle finger down on the 2nd fret of the D-string my pointer finger on the 1st fret of the B-string to give us that C major chord. Sometimes if you’re a true box you can hammer-on to that C major chord so you can get it in between the hits. Again its (optional), I really just want to teach the bare bones of this lesson just by getting these four chords in in order to play it.
So we’re going to start with this E minor chord two times – this d7 chord to a G, to a C, G, C, back to E minor two times, D7 G, C, G. On the chord chart if you just see a G, know that the G chord at the end of the E minor D7 G it’s like a G to a C and you can mix this up a little bit and maybe going to go with a G, to a C, to a C, to a G. That’s kind of a cool thing that you can come back into that E minor. The progression is really simple if you just look at the chords and see this as an E minor even though we’re adding E minor, to d7, to a G, to a C with a G in the bass.
One thing that’ll happen, I think this is the third time around you do a regular E minor. So instead of having the fancy one you do a regular E minor. That’s a great example of the difference between the two.
It kind a gives the same essence is still firmly entrenched in the e-minor class atmosphere but a little bit of a different sound so maybe the first two times around will go up here. D7 to a G, second time exact same thing D7, G, C, G, and then E minor, D7, G, C, that’s essentially the whole song. You may have noticed sometimes I’m adding a different note which I cannot help myself from doing just because I’m so used to like that’s kind of like my personal style. But all that’s happening there is just an extra note.
Let’s take this cord and we started off with the E, D, and B E, G, D, 1, 2, 3, and 4, that’s how you count there right 2, 3, and 4, 1, 2, 3, and sometimes it sounds really cool if on the end of that last beat you hit the B-string with your middle finger really anything off, of your fingers again 1, 2, 3, and 4.
Here’s the difference 1, 2, 3, and 4, 1, 2, 3, and 4, or 1, 2, 3, and 1, 2, 3, definitely one of my favorite songs of all time, my favorite Bob Dylan song for sure it’s got some cool chords that you haven’t played before. They’re just a representation of an extension, an extended chord of the E minor. Simple and one of the beautiful the great songs of all time, definitely a must learn finger picking finger style song.
Make sure to subscribe on our You Tube Channel and we’ll see you in our next video lessons, thanks for watching.


