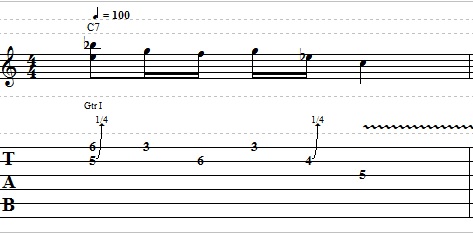
How to Play Killing Floor by Howlin Wolf
In this Guitar Control video lesson instructor Jon McLennan is going to show you how to play all of the main parts of this classic blues song “Killing Floor” by Howlin Wolf. It’s got Hubert Sumlin on guitar and it’s a really awesome guitar part. Jon is going to break this song down for you, starting with the Intro and then he will get into showing you how to play the entire song. And he is going to talk about the unique way that Hubert uses his thumb to play in this song.

Step 1: The Intro
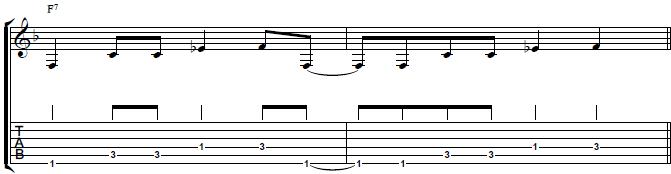
This Howlin Wolf “Killing Floor” Lesson is basically just a 12 bar blues in the key of A. It does sort of a traditional Intro where you start out on the turnaround, which is the last 4 bars of the tune. Starting up on the 5 chord, which would be an E7. And the way that Hubert plays this is he goes way up the fret board to the 12th fret, barring his pointer finger across the 2nd and 1st strings. Then his middle finger is holding down the 13th fret 3rd string, and his ring finger is holding down the 14th fret 4th string. You basically have this 4 note chord, its an E. kind of like the open voicing where your middle finger is on the 4th string 2nd fret and your pointer on the 3rd string 1st fret, but up an octave, so it’s a much higher voicing. The same chord, but played higher in pitch, giving a nice cutting sound. The other thing you’ll notice is that Hubert plays with his fingers. So if you are trying to do this with a pick, you’re going to get a different tone.
What Jon does is he just brushes the strings with his thumb on his picking hand. You’ll get a little callus on your thumb, but really helps the tone and lets you hear the personality of this song. So we have our 1st chord, go ahead and strum it. Then you’re going to add your pinky to the 15th fret 2nd string, making this chord become an E7, still only strumming from the 4th string down through the 1st.
For the strum, when you’re holding down the E before you add your pinky, do an upstroke with your thumb, then add your pinky in and strum down twice. Your pinky actually stays down until the last 8th note for this rhythm. So the entire strum and chord changes look like this. Pinky up, strum up, once hitting that E chord, then put your pinky down for the E7 and strum down, down, down, up, down, and then lift your pinky back up and play one more down on the E.
You can definitely hear the moving melody in the chords which really give this riff a nice quality. Then move your E shape down one whole step, becoming a D. So now your pointer is barring the 10th fret 2nd and 1st strings, middle finger on the 11th fret 3rd string, and ring finger on the 12th fret 4th string. We are going to do the same thing, but now our chord is based off of a D7, really cool shape. The 5 down to the 4 chord, doing the same strum and changes on each and using that thumb.
Then take that same chord and move it down to the 5th fret where it is now an A. So pointer barring the 2nd and 1st strings on the 5th fret, middle finger on the 3rd string 6th fret, and ring finger on the 7th fret 4th string. Do the same strum you did on both of the other chords. So so far we have gone E7, D7, A7, and then we are going to do a E7 in the last measure. Mute the strings and pick the 7th fret 5th string, holding it down with your ring finger. Think of this last E7 chord as a different voicing of the one we started with, this one looks like an open C major moved up to the 7th fret, so the 7th 5th string which is the note held down by your ring finger. So make a C major shape in this position and then add your pinky down on the 3rd string 7th fret.
Picking straight 8th notes focusing on that 5th string, starting on the and of 1 and stopping after you pick the and of 3. Sometimes he plays just the root note, the 5th string 7th fret and other times he plays the full chord. On beat 4 he does this cool hammer on on the 4th string 5th fret from the open. John explains how this last note is pretty wild because Hubert plays it kind of aggressively with lots of vibrato and just sounds so good when Hubert does this. So that’s the open 4th string, hammer on to that 5th fret 4th string and shake it! That takes us into the verse. The 12 bar structure that’s just going to repeat. If you are enjoying this Howlin Wolf classic, be sure to also check out John lesson on how to play How Many More Years by Howlin’ Wolf. So that was the first 4 bars of this song, and how to play the intro.
Step 2: The Verse
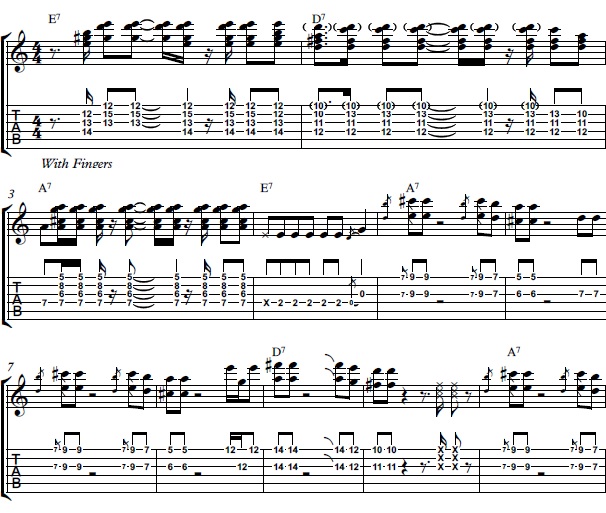
Now that we have that intro down, let’s move onto the verse! Starting by learning how to play through the basic 12 bar blues the way that Hubert does. This is going to follow the basic structure of the 12 bar blues, using the A7, the D7, and the E7. The three chords used in a traditional A blues. Hubert has so much personality in his playing, so much in this guitar part, and every time he plays it it does seem to be a little bit different so Jon is just going to focus on how he plays it in the classic recording and Jon is going to try and break down exactly what he is doing. So the band builds in, that is where we left off before. So what he does is he has these 6th, which is basically the 9th fret 3rd string with your ring finger and the 9th fret 1st string with your pinky strumming from the 3rd string down through the 1st and he slides into it. Jon is strumming with his thumb still and is really dampening the other notes around it. So far using that same shape for all the 6ths, and starting by sliding in from the 7th fret to the 9th, strum the 9th fret twice. The 9th fret is really just part of the A chord. Then we slide down just passing to the next note in the scale. Going back to the 7th fret with our 6th shape.
Now our shape changes, use your pointer to hold down the 5th fret 1st string, and your middle finger to hold down the 6th fret 3rd string. So from the top, slide from the 7th fret to the 9th with that first 6th shape and strum twice.. Then slide from the 7th to the 9th back to the 7th again with that same shape, then to the new shape once, back to the original shape on the 7th fret. That is kind of his way of playing A7.
If you want you can keep your thumb strumming constantly only accenting the hits you want to hear, or just strumming the ones you want to hear and not keeping your strumming hand constant. Then he makes this almost kind of squawking sound on the 3rd string 7th fret, holding it down with you ring finger and picking it twice. Then making that full chord shape again. So the C major shape on the 7th fret with your pinky added on the 7th fret 3rd string. Sliding it up to the 9th fret, then back down to the 7th, then back to the 6th you did earlier around the A7, pointer on the 5th fret 1st string and middle finger on the 6th fret 3rd string, back to the E7, making the C shape and adding in the pinky on the 7th fret 3rd string. These 6ths are just great figures to know.
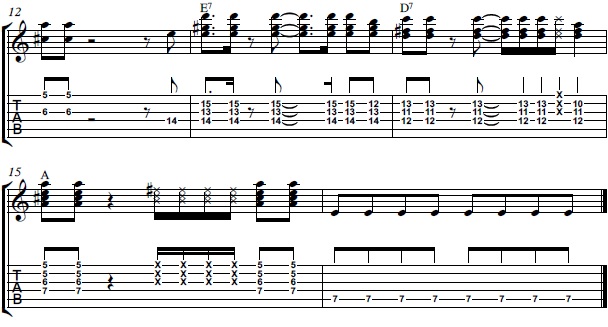
Jon creates so many rhythm parts to the songs by just using this concept, so it is a great one to know, and its very useful. Now we’re going to move up to the 4 chord, which would be D7. The way that he plays this D7 is the same way he was playing the 6th, place your middle finger on the 12th fret 3rd string, pointer on the 11th fret 2nd string, and your ring finger on the 12th fret 1st string. Alternating between have your pointer held down and lifting it up. So again mainly using his thumb for everything on this track, but for this part he still doesn’t use a pick but he uses not only his thumb but also his pointer finger. So now picking the 1st string with his pointer, then the 3rd string with his thumb, back to the 1st string with his pointer and then sliding this shape into the 14th fret, to the D chord.
Follow along with Jon at the 9:30 mark. So after the slide up to the 14, walk back down to the voicing on the 12th fret, then you are going to make the same shape you did for the eA7 on the 5th and 6th fret but now doing it on the 10th and 11th frets. So middle finger on the 11th fret 3rd string and pointer on the 10th fret 1st string and pick it twice. Just like we did before in the other positions, just reapplied now over the 5 chord. Then you can just throw some mutes in between if you’d like. See the video at 10:13 to see what Jon is doing to add in the mutes. In the last 4 bars you are going to tie in the intro.
Going back to that first chord shape the E7 where your ring finger is holding down the 4th string 14th fret, your middle finger is holding down the 3rd string 13th fret, and your pointer is barring the 2nd and 1st strings on the 12th fret. Doing the same exact strum from the intro and going between this E chord to an E7 by placing your pinky down on the 14th fret 3rd string. Then moving down and doing the same thing on the D7.
Then for the last measure you can just go to the straight A chord. Strumming the A, see video at 11:42 for the strum. Strumming down up on beat 1 and the and of one, then muting and scratching the guitar strings up and down on beats 3 e and a, and then strum the A again on beat 4 and the and of 4. Then do that same build we did earlier with your third finger on the 7th fret 5th string, in straight eighth notes, one and two and three and four and. Then go to 12:10 to see John put the whole thing together, starting with the first time through the intro.
Recap: Howlin Wolf Killing Floor Lesson
I hope you like Jon’s Howlin Wolf “Killing Floor” Lesson! There’s so many unique and cool things covered in this video. Have a lot of fun bring a new tone and personality to these rhythm parts by using your thumb! You can have fun with these new ideas and try it on other songs you’ve learned, your own songs, or write one on the spot! Remember to pay close attention to all the little details and changes, to isolate chord changes that may be difficult.