
How to Mix Melodies with Fingerpicking Guitar Chords
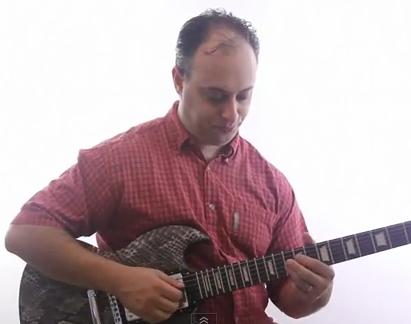
In this Guitar Control video, Robert Baker gives us some fingerpicking guitar lessons. Not just normal fingerpicking though, picking in melody inside of our chord. So we are going to take a very simple chord progression, just a G, to C to D, back to C back to G. But we are going to have a simple melody line that’s happening at the same time we are fingerpicking these chords. We will go more in depth below. This concept is often referred to as chord melody. You play the chords but also use notes within or nearby the chord to play the melody without lifting your finger from the chord shape.learning how to mix melodies with fingerpicking guitar chords is such a great, incredibly useful tool for songwriting.
Step 1: Alternating Melody Notes on One String
Like you’d expect any of our fingerpicking guitar lessons to start out, Robert plays an example for us. What is happening here is he is fingerpicking everything. There is a simple melody line all played in the open position. Then we add the chords on top of it, playing both the rhythm and the lead guitar at the same time.
To start Robert is playing the 6th string and the 1st string with his thumb and middle finger finger picking with his picking hand and his fretting hand holding down almost an open G chord. He is holding down two notes based off off of the open G major chord but he is actually just placing his middle finger on the 6th string 3rd fret and his ring finger on the 1st string 3rd fret. Then Robert uses his middle finger on his picking hand to pluck the open 2nd string and then using his pointer on his fretting hand to pluck the open 3rd string. Then back to the start, picking both the 6th and 1st strings in the shape based on the open G chord, but this time Robert has picked up his ring finger that was holding down the 1st string 3rd fret and now plucks the 1st string with the 6th still but the 1st string is open. Then he again plucks the open 2nd string and then the open 3rd string. Then he holds down the 2nd fret on the 1st string, back to the open 1st string, back to the 2nd fret 1st string and then back to the open 1st string. Using his pointer to hold down the 2nd fret 1st string.
The first thing you should do is really get this change down. If you are not used to fingerpicking this can be a little challenging, hitting two notes at the same time. So practice switching back and forth between alternating the note played on the 1st string from your ring finger on the 3rd fret to open to pointer on the 1st fret back to open and then repeating all over and over. Feel free to practice at whatever speed you are comfortable with.
If you are enjoying this fingerpicking lesson be sure to also check out our other guitar control video on finger independence exercises.
Step 2: Applying The Fingerpicking pattern to the C Major Open Chord
Now Robert is going to apply this same technique to the open C major chord. To play an open C major chord, place your ring finger on the 5th string 3rd fret, your middle finger on the 4th string 2nd fret and your pointer on the 1st fret 2nd string. Strum from the 5th string down, not picking the open 6th string but including the open 3rd and 1st. Now
Robert adds his pinky to the 3rd fret 2nd string, still holding down the 2nd string 1st fret with his pointer, and then takes a very similar approach to the first shape we played. The reason it’s ok to have both fingers on the same string is because the guitar only picks up the note closest to the sound whole, so while the pinky is held down on the 3rd fret 2nd string you will not hear the note on the 1st fret that your pointer is holding down. Start by plucking the 5th and 2nd string together. Using your thumb and ring finger, thumb of the 5th string and ring finger on the 2nd. Then pick the 4th string with your pointer, of course all while holding down that open C major shape and then pick the 5th string also with your pointer finger, while still holding down the open C major shape.
Then do the same exact picking pattern but this time pick your pinky up so now when you play the 2nd string you hear the 2nd string 1st fret you are already holding down in the open C major shape with your pointer.. So 5th and 2nd string together, followed by an open 3rd string and then an open 4th string.
Step 3: The D Major Chord
Now we are going to apply this same picking pattern to the open D Major chord. Actually kind of more like a D sus 4. To play a normal open D chord you place your pointer finger on the 3rd string 2nd fret, your ring finger on the 1st string 2nd fret and your middle finger on the 2nd string 3rd fret. Then strum down from the open 4th string to the 1st. To make the D major a Dsus4, keep everything the same, but place your pinky finger down on the 1st string 3rd fret, changing the 3rd scale degree in this chord to the 4th scale degree l, making it a sus chord. So we do have two fingers on the same string again, but you will see why in a second. The two fingers on the same string being your pinky on the 1st string 3rd fret and your middle finger on the 1st string 2nd fret.
So for this one Robert is playing the 4th string and 1st string together, with his thumb on the 4th string and his ring finger on the 1st string. Then he takes his middle finger and plays the 2nd string and then his pointer finger on the 3rd string. Now pick up your pinky so when the 1st string is picked you will now hear the note your middle finger is holding down on the 1st string 2nd fret. Then pick the 4th and 1st strings together again now hearing the open D major voicing not the Dsus4 and then pick the 2nd string and then the 3rd, just as we did before. Now we kind of set ourselves up here. Now lift your middle finger up off the fretboard and pick the 4th and 1st strings together again this time with the open 1st string. So and open 4th and 1st string together. Then pick the 2nd string and then the 3rd string. Then strum an open C major chord and then an open G. For the G place our middle finger on the 3rd fret 6th string, your pointer finger on the 5th string 2nd fret, your ring finger on the 2nd string 3rd fret and your pinky on the 1st string 3rd fret, and strum all the strings from the 6th string to the 1st.
Step 4: Helpful Tips
So a few things you might want to do while fingerpicking are muting the lower strings. Robert purposely tried not to mute in this video but a lot of times muting the lower strings can be helpful. The strings you are of course not using in the chords you are playing. If you mute you can be a little more percussive. Robert demonstrates both ways. Muting tends to clean up the playing a bit. Keep your picking hand very steady and you will also notice that Robert keeps his fretting hand very steady as well and calm and relaxed.
Playing guitar in general you want to always play calm and relaxed, but with finger picking especially if you get too tense you end up plucking either your low or high notes too much and they just end up drowning each other out and we don’t want that. We want to have a nice, even flow where you should be able to hear both strings ringing out clearly even though some are lower and some are higher, it’s all about that picking hand control.
Recap: How to Mix Melodies with Fingerpicking Guitar Chords
I hope you enjoyed Robert’s fingerpicking guitar lessons. Whenever you add that melody line into the rhythm of just playing some simple, open chords, it is simple but so effective. Sometimes the best thing, is just some simple chords. Be sure to follow along carefully and slow these examples down, pay attention to the fingers you should be using and isolate any difficult transitions between chords and the melody line. Practice both the melody line and chord changes separately, and of course, as always, have fun! That;s what guitar is all about!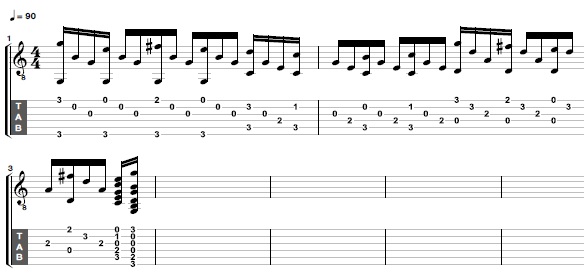
Click Here to Learn More