Challenge your skills with this Joe Satriani chord progression from Always With Me, Always With You from Guitar Control instructor Darrin Goodman. Be sure to get the free tabs so you can easily follow along.

Introduction
How’s it going everybody? This is Darrin with GuitarControl.com bringing you this video lesson and today I want to show you how to play one of the chord progressions from the Joe Satriani song Always With Me, Always With You. So this particular song I’ve done previous lessons in the past on some of the melody lines and leads from it, but this is a really cool chord progression and it’s and it’s relatively short so you could like make a recording of it or use your looper and then it’s really fun to solo over the top of. I also think this is a really good progression to work with because you have to palm mute every note and then you’re arpeggiating the chord; so it’s a really good exercise for that.
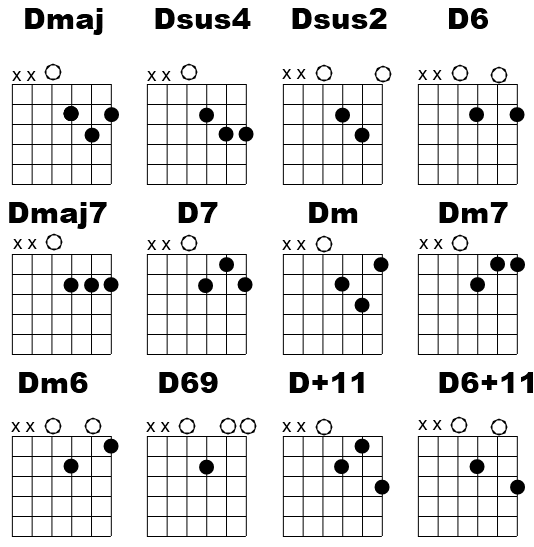
Right now we’re offering this really cool free chord chart and there’s a link in the description that you can download it and print it off in PDF format so you have every chord that you could ever need for whatever you’re doing all in one place; it’s really a useful handy tool.
So be sure to click on the link in the description for the tabs and let’s get close up and take a look.
Joe Satriani Chord Progression
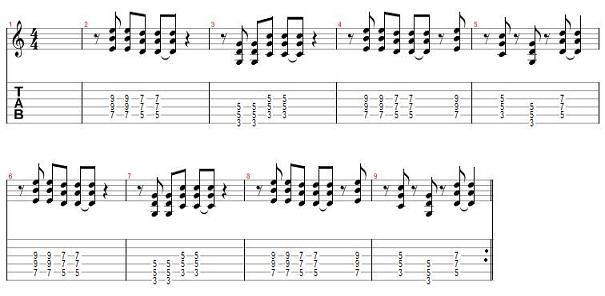
All right so our first chord is B add 11 (Badd11) and a lot of these chords have big crazy names, but they’re not too terribly difficult to play. So for this first chord here, Badd11, my first finger is on the second fret of the A string, my third finger is on the fourth fret of the G string and my fourth finger is on the fourth fret of the B string and the high E string is open. So we’re going to pick this starting on the A string so it’ll be; A, G, B, E, B and G and this is in three four time (3/4) and this is all completely made up of eighth notes, so it’s just one and two and three and one and two and three and… So let’s just run through the chords and then we’ll work with the actual technique. So you have two measures of it so you play it twice… Then we have E minor seven add nine (Em7add9) and for this we’re going to put our first finger onto the first fret of the G string, our second finger onto the second fret of the B string and we’re going to pick this starting on the low E; so we go E, G, G and then we’re going to take our fourth finger and pick up the fourth fret of the B string and then take that back off so now we’re back down to the second again and then follow that with the G string, so one and two and three and. Then we have F sharp suspended four (F#sus4); so first finger here is just going to barre the second fret across all the strings and then we’re gonna put our third finger onto the fourth fret of the D string and our fourth finger onto the fourth fret of the G string and now we’re going to pick E, D, G, B, G and D, one and two and three and, and that’s the first four measures and then those repeat three times. So there’s actually one more chord that comes in the second part of this and that other chord we have is G sharp minor 11 (G#m11). So what we’re going to do is we’re just going to take this F#sus4 chord and we’re going to keep that shape, but we’re going to take our second finger and bring it over and pick up the fourth fret of the low E string and then take our first finger and put it on the second fret of the B string and do the same picking, excuse me, so the third finger should be on the third fret of the D string and I was on the G string. So we’re on the fourth fret of the low E string, the fourth fret of the D string, fourth fret of the G string and the second fret of the B string… and then the rest of the chords are just the same ones we’ve done except the very last one and we’ll just get to that when we when we get to that point, it’s pretty easy. So the first thing I would do is work on getting the chords down in the transitions and then you can work with this part of it. So he’s palm muting every single note, so it’s really challenging to be able to consistently get every note palm muted… So all I’m doing is just taking this part of my hand right here, just this edge here and I’m resting it right across the bridge; so if you’re too far forward it’s just dead sounding and if you’re too far back it just sounds like the open string, so if you find that sweet spot it’s just dampening the note and it still rings out for just a second. So it’s really hard and kind of hard to find that sweet spot especially if you’re new to this technique. So one and two and three and one and two and three and, and now we switch to that Em7add6… and then the F#sus4 and then it would just start over again… So it’s difficult to consistently get every note palm muted, so just keep at it, and if you notice consistently that it’s a particular string that you’re not getting the palm muting on, like say maybe it’s your B string or your G string, so just move your hand until you find that spot and then just scoot your hand up to those strings… so that way you’re getting them all muted. Alright so that section repeats three times… and after it repeats three times we go to that G#m11; so I’m just going to keep my third and fourth fingers where they are and bring my middle finger to the fourth fret of the low E string and my first finger down to the second fret of the B string. Then go to the Em7add6 and then to the F#sus4. So this is where we’re going to have this change so now all I’m going to do is remove my pinky from the fourth fret of the G string and put my middle finger down onto the third fret of the G string… and that’s where it wants to send you back to the top, back to the to the B voicing. So I’ll just play the first four measures from the third time through and then play these last four measures… and then it would just simply start over again.
Conclusion
All right so there you have it, the chord progression or one of the chord progressions from Always With Me, Always With You by Joe Satriani. Like I said aside from this just being a cool chord progression and some kind of different chord voicing’s and different chord ideas than maybe you’ve used in the past, but it’s just the whole technique of keeping the whole thing palm muted the whole time that you played as you know part of the challenge, but it’s just it’s a really great exercise and this progression is really fun to solo over. So if you like this lesson be sure to give me a thumbs up and leave a comment down below if you have any questions about this or other guitar related topics. If you have not already done so please subscribe to the channel and hit that notification bell so you don’t miss any of the content that we upload throughout the week. Well that is all I have for you today. Thanks for watching and have a great day.