You’ve been pleading with your parents for a long time. Finally, after all this time, you finally got it: your very own guitar. The excitement is bubbling out of you. You can’t wait to play all kinds of music, maybe even sing a song for that special someone. But in all of the ideas and hopes, where do you even start?
First, you must know that there are endless amounts of different ways to play the guitar. Because of that, you will never find two people that play the same way. As you grow in your talent, you will develop your own style that makes you different from everyone else. With that, you must start out with basic knowledge as a beginner.

This is a diagram of a guitar. As you can see, each string has a name and corresponding letter. You must make sure you memorize these, it will help you a lot in the future when you’re attempting to split chords. Now I know some people aren’t too good with memorizing, so here’s an easy way I remembered them myself. From the thickest string to the thinnest, remember this sentence: Earnie Ate Dynamite, Good Bye Earnie. Sounds silly, right? But if you take the first letter from each word in the sentence, you have the proper order: E, A, D, G, B, E.
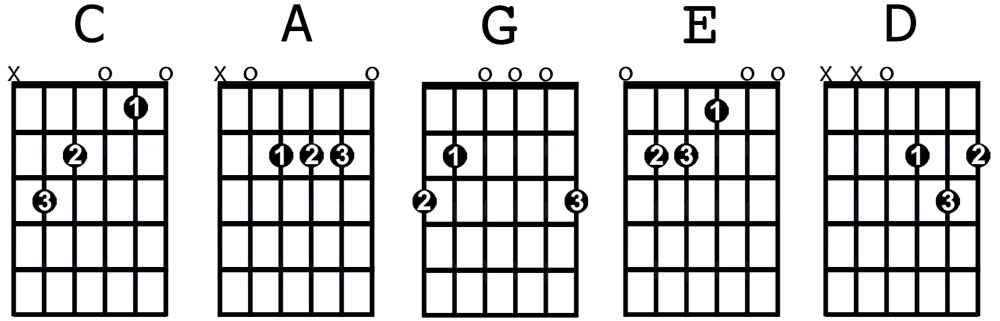
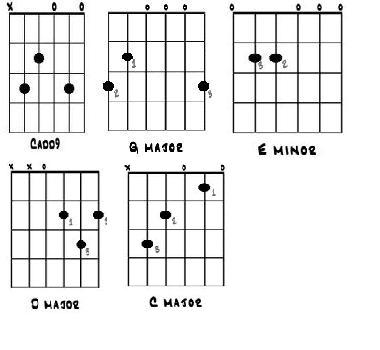
Next, take a look at these, but only focus on the one that has a G above it. These are what are called chords. The one with the G is called a G chord. To play a chord like this, the easiest way is to flip it to the side so that it looks like the first diagram with the strings. Then, you count how many frets away from the end of the fretboard the dot is and place your finger there.
Here´s a cool lesson for all of you guitar newbies, check it out:
BEGINNER GUITAR LESSON
Keep in mind that you cannot place just any finger there. As you can see, each dot is numbered. The numbers tell you which finger to use. 1 is your index finger, 2 is your middle finger, and 3 is your ring finger. So looking at the G chord, you will place your index finger on the 2nd fret of the A string, your middle finger on the 3rd fret of the low E string, and your ring finger on the third fret of the high e string. For the strings that don’t have any fingers on them, the diagrams will have either little circles or x’s above them. If there’s a circle, that means play the string, if there’s an x, that means don’t play it. Try playing the G chord. Once you figure it out, use the same method to play the other 4 chords. Have fun, guitarists, and good luck!
I also recommend you to check out some of our best courses in DVD:
BEST SELLING GUITAR COURSES