How to Play Down On The Corner
Today Guitar Control instructor Robert Baker, is going to show you how to play “Down on the Corner” by Creedence Clearwater Revival, also known as CCR. Robert is going to cover the bass line in the beginning and strumming for this song. The strumming in this song is a little tricky because this song does contain a bar chord. Don’t worry because of course, Robert, is going to walk you through it.
[contentwall]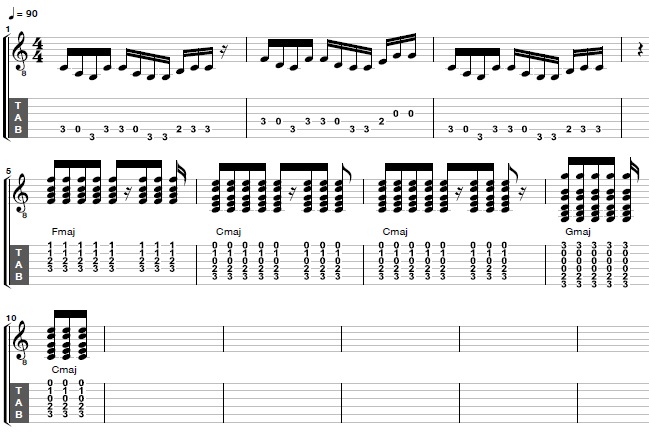 [/contentwall]
Step 1: The Bass Line
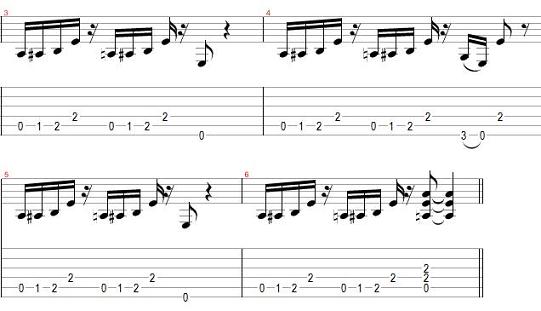
The first step, in learning how to play Down on the Corner is mastering the opening part of the song, the extremely catchy bass line. Starts by placing his ring finger on the 5th string 3rd fret and picking this note once, followed by picking an open 5th string, then he moves his ring finger up a string to the 6th string 3rd fret. Then he simply hops back down to the 5th string with his ring finger on the 3rd fret and picks it twice. Then he picks the open 5th string followed by the 6th string 3rd fret twice now. Then puts his middle finger on the 5th string 2nd fret, his ring finger on the 5th string 3rd fret twice. So this line is a little bit tricky because it’s the same notes used over and over again, but the pattern changes and once you get it, it becomes very, very easy. Be sure to practice it slowly first. Now repeat all of this again.
The next part is almost identical, but slightly different. Move down a string starting on the 3rd fret 4th string with his ring finger, then play an open 4th string, then play the 5th string 3rd fret once. Then move your ring finger down to the 4th string 3rd fret and play it twice. Play the open 4th string sand then the 5th string 3rd fret twice with your ring finger. Here, where it changes though. Now, go to the 2nd fret on the 4th string and then open 3rd string twice. Then start back over again going back to the original line focusing on the lower strings. This will happen again later in the song during the solo break. It is the exact same thing, just in the beginning you hear the bass playing it and then the guitar comes in to harmonize with it, but other than that that is basically what is happening in this part.
Step 2: The Chords
Now is the time to dig into the chords that are happening behind the melody we just went over. So once the full band comes in, you have this chord progression going on. Remember we’re going to use an F Major bar chord in this song. But don’t worry it’s not too bad if you want to substitute an open F Major chord for the bar chord.
If you are struggling with your chord changes or just want some tips to get them even better, be sure to check out our video, how to change chords faster.
To play a normal F Major open chord, bar the 2nd and 1st strings on the fret. Then place your middle finger on the 4th string 2nd fret and your ring finger on the 5th string 3rd fret. Strum from the 4th string down to the 1st.
To play the bar chord version, place your pointer finger down on the 6th string and press it down putting pressure on every string from the 6th to the 1st. Then place your ring finger down on the 5th string 3rd fret, your pinky on the 5th string 3rd fret, and your middle finger down on the 4th string 2nd fret. Then strum this chord 4 times, down up down up down then a small break then up down up down. Then switch to the C Major chord. If you chose to use the open F Major chord this change will be very simple. To play a C Major open chord place your ring finger down on the 5th string 3rd fret, then place your middle finger down on the 4th string 2nd fret and your pointer down on the 2nd string 1st fret. Strum this chord from the 5th string down. Do the same strum, down, up, down, up, down, a small break and then up, down, up, down.
Notice that one thing Robert does is he chokes the chord. This means that instead of letting everything ring out, when he gets to the parts where there is space between the chords, he mutes the guitar completely, and chokes the chords.
He does this by picking his fingers up, not off the guitar up, to mute the strings and it gives you a little bit more of a definitive stop when one strum happens and the next one starts. Play the C Major chord again, then to G Major, Robert is using the three finger G, played with his ring finger on the 6th fret 3rd string, his middle on the 5th string 2nd fret, and his pinky finger on the 1st string 3rd fret and then do the first half of our normal strum, the first five hits. Before we had space and strummed four more times, this time we still do those four strums but now on the C. So we split this strum up between these two chords. So on the G we strum down, up, down, up, down, and then move to C, and strum up, down, up, down.
The progression starts with an F, then two times through the whole strum on C, then splitting the strum in half on G to C. This same strum remains for the other parts in the song, too. For the verse, keep this strum but start with C, then G major, just the first five strums and then back to C for the last four and then repeat all of that over and over. Then to F and do the same thing we do in the beginning. F to C, C again, to G for the first five strums, then back to C for the last four strums.
Recap: How to Play Down On The Corner
That is the entire lesson on how to play “Down on the Corner” by CCR. Remember to pay attention to the strum directions and chord changes. Also, practice the first bass melody line slow and careful as it uses lots of similar notes. Make sure you learn and get it right the first time so you can speed it up quickly and easily. And of course, as always, have fun!
[ninja-popup ID=715]