How to Play Over the Hills and Far Away on Guitar

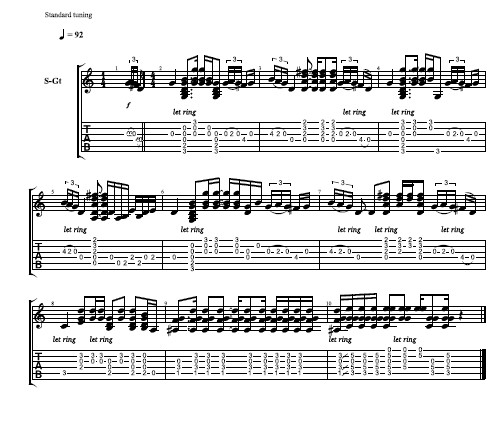
In this Guitar Control video lesson, I’m going to show you how to play “Over the Hills and Far Away” on guitar. This song is extremely unique and is a bit challenging, so you are going to want to make sure you pay close attention to the changes and slow them down. In this lesson I am going to focus on showing you the intro which is also the verse and really most of the entire song itself. The only other [arts to this song are the bridge and solo, but for today we are going to take an in depth look at the verse and break it down.
Step 1: Breaking Down the Main Riff
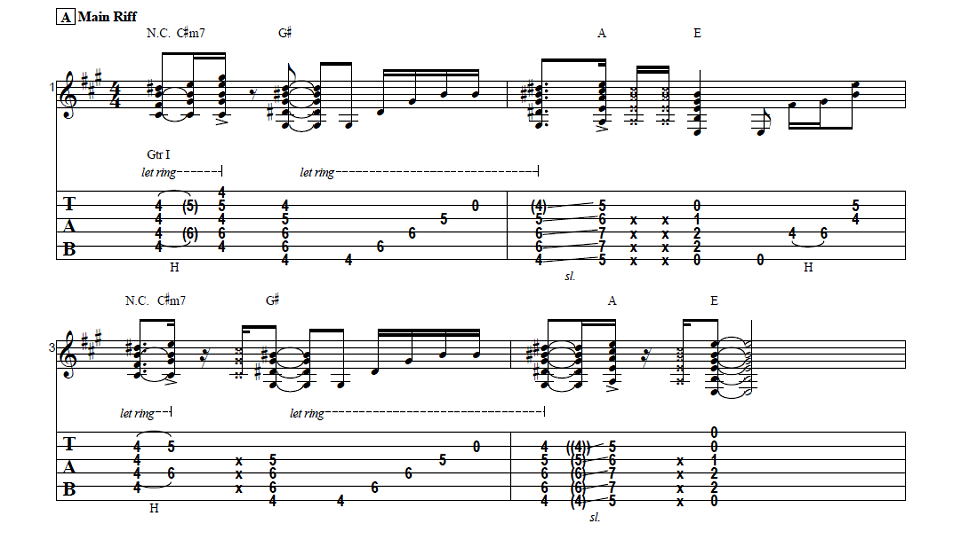
Learning how to play “Over the Hills and Far away” on guitar is pretty simple, but it’s a little tricky because we’re using our first and our third fingers. So first we pick the 3rd string open, then we hammer-on /pull off on the 2nd string 3rd fret with our pointer finger. Then we place our third finger on the 4th string 4th fret. Remember it’s a hammer-on/ pull off and we’re pulling off to nothing, we pull off to zero. So I take my finger and I pull it off the string, I push it off. Then, after you play the 4th string 4th fret, You’re just going to pick the 3rd string open.
It’s a little tricky because we’re using our first and third fingers, we’re not using fingers that are right next to each other but once you get the hang of it, it’s really cool and should be fairly simple. Then straight into a G, strumming down, down, up, up, down. To play an open G major chord take your middle finger and put it on the root, the G note, which is the 3rd fret 6th string, then place your pointer on the 5th string 2nd fret and then there are two ways to play this bottom half of this chord. You can take your ring finger and put it on the 3rd fret 1st string or because both the B and D notes are note that are in the G major chord, you can actually put your pinky where your ring finger was instead, the 3rd fret 1st string, and put your ring finger on the 2nd string 3rd fret. It’s totally personal preference, I am using both fingers when I play it. If you are enjoying the strum pattern in this song, be sure to check out the Guitar Control lesson, how to play Down on the Corner by Creedence Clearwater Revival.
Step 2: The Variations
The Next lick is really similar. So we pick the open 3rd string and then do a hammer-on/ pull off on the 3rd string 2nd fret to the open string. Then same thing as before but not around the D Major chord. Then go to the 4th fret 4th string with your ring finger and do the same thing, pull off the 4th fret 4th string to the open 4th string. But now we have a fancy variation where we go on the 3rd string and we place our ring finger on the 3rd string 4th fret and pull off to the 2nd fret on the same string, the 3rd string, with our pointer. So instead of pulling off to zero/nothing we pull off to that 2nd fret and then to the open 4th string. So all together to a D major chord. To play a D major chord, we make a peace sign and put our pointer finger on the 3rd string 2nd fret, then place your middle finger on the 1st string 2nd fret, and then your ring finger on the 2nd string 3rd fret and strum from the 4th string down. I did the same strum for D major that I did for G major, down, down, up, up, down. Now put both of these together. The repeat the entire thing again, except this time when you get to the D major chord at the end where we do the strum pattern, only strum the chord once and stop.
Step 3: The Fill
Immediately after that part where we played the D major chord only once, we are going to go straight into the fill. First pick the 4th string open, then pick the 5th string open, then use your pointer to play the 5th string 2nd fret. I kind of barre it because I am going to hit the note right under. Instead of barring I actually kind of more roll my finger, but you definitely can bar it. So with your bar down or with your rolling effect, play the 5th string 2nd fret, then the 4th string 2nd fret, back to the 5th string 2nd fret. Then another open 4th string to the 2nd fret 4th string, back to open. At the 5:45 minute mark you can see me play this part and then play everything together up to this point.
Step 4: Finishing the Progression
Then we are going to go straight to the G major chord again with the same progression, down, down, up, up, down. Then do the fancier fill the one that always goes into the D major chord, and then do the same strum on D major. After this D chord we go ahead and do the very first fill we learned. Starting with an open 3rd string, then a hammer-on/ pull off to the 3rd string 2nd fret back to zero. Then the 4th string 4th fret with our ring finger pull off to zero, the open 4th string. So here is that simpler fill which is really the beginning of the fancier one, too. Straight to a Cadd9 chord and then to a G/B. for the strum, you strum down, down, down, up, on the Cadd9 and then down, down, down, down, up, on the G/B.
The Cadd9 chord looks just like the G major chord except you move your middle and pointer finger each down one string, it looks like the G major shape with both your ring and pinky fingers at the bottom, not the G that only uses the ring finger. So middle from the 6th string 3rd fret to the 5th string 3rd fret, and pointer from the 5th string 2nd fret to the 4th string 2nd fret then just like the G major your ring finger on the 2nd string 3rd fret and your pinky on the 1st string 3rd fret. To play the G/B which is just a G chord with a B note in the bass, if you make the full G major shape with the ring and pinky holding down the 2nd and 1st strings, all you would do is lift your middle finger off the guitar and that’s the chord, or if you’re looking at it from switching from the Cadd9, you would still lift your middle finger off the guitar and move your pointer finger up one string. So it would not sit on the 5th string 2nd fret and everything else is the same, ring finger on the 2nd string 3rd fret and pinky on the 1st string 3rd fret.
Now we are going to go from a Bb6 to a C. We play these a little interestingly though, different than what you are probably used to. So for the Bb6, first take your pointer and place it on the 5th string 1st fret, then make a power chord shape, placing your ring finger on the 4th string 3rd fret, then skip the 3rd string and place your pinky down on the 2nd string 3rd fret. Then strum down down down down a little more spaced out and then down down down down down quicker. Then pick the Bb6 once and slide it, the entire shape, to the 3rd fret now for our root held down with our pointer finger. So pointer on the 3rd fret 5th string, ring finger making the power chord shape, holding down the 4th string 5th fret, skip the 3rd string and place your pinky down on the 2nd string 5th fret And that’s the C.
So I’m sliding it and it’s like someone just pushed my hand, I’m keeping all the pressure down to sustain those notes and I’m pushing all of them over. If you pick up you lose that note, so it’s really important to keep that sustain by keeping the pressure down and really strongly moving it where you want it to be. From the 1st fret to the 3rd fret.
For this C I go, slide into it, then down, down, down, down, down, then down, down, down…but the last group of three I go from accenting the high strings to the low back to the high. See the video at about 8:40 for a close up and to see this strum slowed down.
Recap: How to Play Over the Hills and Far Away on Guitar
I hope you enjoyed learning how to play “Over the Hills and Far Away” on Guitar. This song is so cool and unique. It has that Zeppelin feel but also a feel of it’s own. Remember to slow these parts down and learn them slow before you learn them fast so that you really know what you’re doing. You don’t truly know something if you can’t play it slow, but can play it fast. So pay extra high attention to detail.

