Hey, how’s it going this is Darrin Goodman with Guitar Control, I want to show you a really easy acoustic piece this is the Intro for the song “Broken” by Cedar. Really simple one to play on your acoustic guitar and it sounds really cool, recognizable and stuff.
[contentwall] - Seether.jpg) [/contentwall]
[/contentwall]
[ninja-popup ID=715]
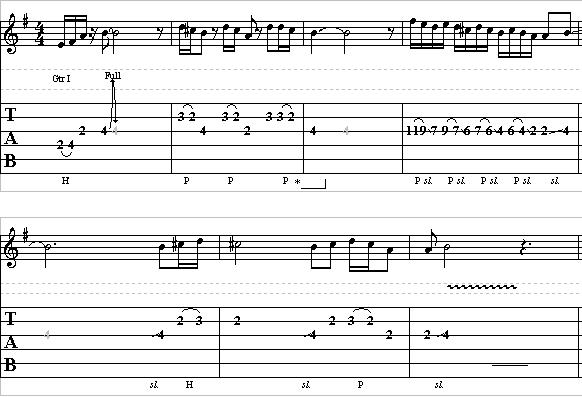
So first, it’s not really a chord per se so I will just skip all the funny names and stuff and we’ll just show you how to do it so your first finger is going to be on the 2nd fret of the 4th string and your second finger is going to be on the 2nd fret of the 1st string and I’m finger picking this. Take a look at the right hand in just a minute first finger 2nd fret of the 4th string second finger 2nd fret of the 1st string and we’re going to pluck the 4th and 1st string at the same time and then do a hammer-on to the 3rd fret of the 1st string with your third finger and then we follow that with the 2nd string open and then back to the 4th string again and then 1st string and then we go from there – its G5 over C, so what I’m doing is I’m getting the 3rd fret of the 5th string with my second finger and then 3rd fret of the 2nd string with my third finger and 3rd fret of the 1st string with my fourth finger and I’m playing the 5th string with my thumb and then the 1st, 2nd, and 3rd strings with my first second and third fingers so that’s the first measure and the riff goes.
Then following after you pluck that G5 over C, then your fingers are already where they need to be and you just pick strings 3-2-1-2, and then follow that with the 4th string open three times and that’s basically the main riff for this. So that’s the first two measures we have and then it repeats a total of three times before it goes to the next part.
The next part is actually just the good old tried-and-true D chord, I’m sure you already know 4th string open 2nd fret of the 3rd string with your first finger 2nd fret of the 1st string with your second finger and 3rd fret of the 2nd string with your third finger. So on this riff it uses it actually goes from D suspended to 2D to D suspended 4 and back, so if you don’t know what that is if you take D and just remove your second finger that’s D suspended 2 and then if you take your fourth finger and you place it on the 3rd fret of the 1st string that’s D suspended 4, so this R if you start with off you do the D but you remove your second finger so it’s actually like the D suspended 2 and you pluck the 1st and 4th strings at the same time and then do a hammer-on to that 2nd fret of the 1st string with your 2nd finger and then follow that with the plucking on the 2nd string then the 3rd string. Now you’re going to put your fourth finger down on the 3rd fret of the 1st string which makes D suspended 4 and you’re going to pluck that and do a pull off to the 2nd fret, so you want to keep that second finger held down and then you pluck 4 and 2 simultaneously.
So far in that riff we have, and then we go back to the 1st string open hammer back to the 2nd fret again 4 and 2 together again and then 3 to put your pinky down on the 3rd fret of the 1st string again 1, 2, and then 3 and 4 open so that’s the whole second riff with the D and then it just basically starts over.
Now let’s take a look at what I’m doing with my right hand with the strumming hand. So the notes that you play on the 1st string will be with your third finger the notes you play on the second string will with be with your second finger and the notes on the 3rd string will be with your first finger and then the base notes alternate from being the 4th string and the 5th string and you use your thumb to do both of those. So on that very first riff I’m using my thumb to play four and my third finger to play one and I’m playing them at the same time and then do that hammer-on we talked about then I go to the 2nd string so I use my second finger back to the 4th string with my thumb and then back to the 1st string with my third finger and then when I go to that G5 over C. I played the 5th string with my thumb and then the 1st, 3rd string with my first finger 2nd string with my second finger 3rd string with my third finger and I play all of them at the same time so if you haven’t done a lot of finger picking and stuff with this you want to make sure that you’re just pulling up my fingers enough like that, I’m not sure how well you can see that on here and we try to get a better angle you want like that you don’t want where you’re grabbing and pulling it away with your whole hand you want this kind of a pimp pluck the more you can keep your hand close to the guitar and the strings when you’re playing to it the better you know that it lowers your chances of error drastically, so that’s the first part.
Now for the second part of it where it’s with D so thumb is playing the 4th string first finger is playing the 3rd string second finger is playing the 2nd string third finger is playing the 1st string so we hit 4 and 1 simultaneously and do that hammer-on and then follow that with 3-2 and then we do that next pull off. So on the 1st string so our third finger and then we do 4 and 3 together then the 1st string again and they’ll be your third finger on that 1st string and then 4 and 2 together again so your thumb on for your second finger on two and then three be your first finger to one second and third finger and then second finger again, 2nd string again with your 3rd string with your first finger and then four with your thumb and then the riff just starts over again.
I hope you enjoyed that and got something out of it like I said this is a fairly easy riff to play and it sounds really nice to play in your acoustic guitar or your electric guitar for that matter really recognizable, people seem to dig this riff so you get those get those tabs so you can follow along if you liked the video and you got something out of it you know give me a thumbs up leave a comment down below if there’s anything you’d like to see me or any of the other instructors at guitar control.com do in future lessons and don’t forget to subscribe on our You Tube Channel and we’ll see you in our next video lessons, thanks for watching.


